

Blog
Home || Blog
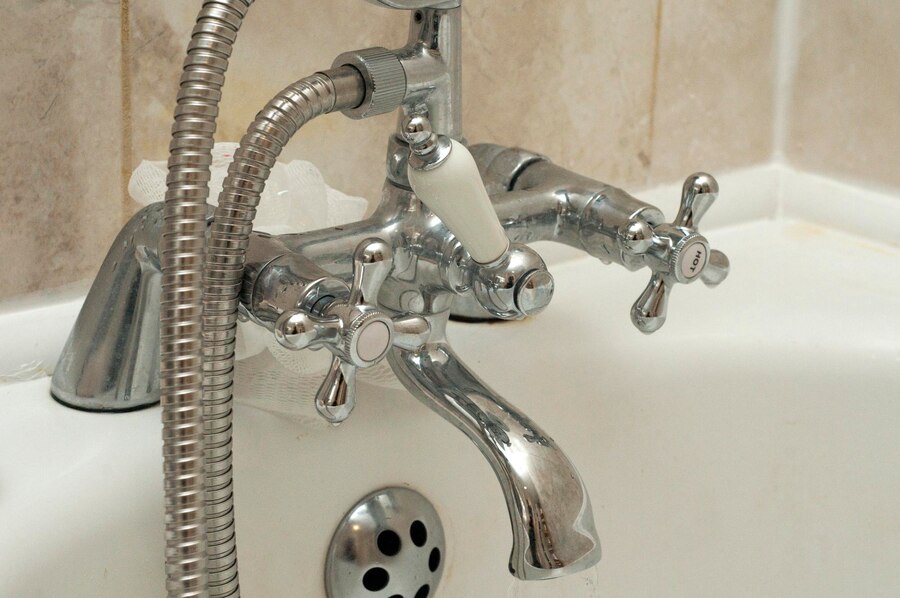
A leaking bathtub faucet isn’t just a nuisance—it’s a sign of wear that can waste water and drive up your utility bills. In many cases, the slow drip or persistent leak comes from worn-out parts inside the faucet. Over time, washers, seals, and cartridges can break down from consistent use. Left unchecked, even a small leak can lead to water stains, mold growth, or corrosion on plumbing fixtures. Catching and addressing the issue early can help avoid bigger repairs later.
For homeowners in Cleveland, this is a common household issue that often disrupts daily routines like bathing kids or getting ready for work. Understanding how faucet components operate makes it easier to know what’s wrong and what steps to take first. This makes the repair process much less intimidating. Whether the water won’t stop dripping or the handle feels too loose, knowing where to start can help you restore full function to your bathtub without unnecessary delays.
Tools And Materials Required
Being prepared before beginning any plumbing job makes the task smoother, especially when it involves bathroom fixtures. You’ll want to have all the tools ready before you even turn off the water. While repairs might vary depending on your faucet type such as compression, cartridge, or ball, there are several common tools and supplies that apply to most bathtub faucet repairs.
Here’s a practical list of tools and materials you’ll likely need:
– Flathead screwdriver or Phillips screwdriver, depending on the faucet
– Allen wrench (hex key) for handle set screws
– Adjustable wrench or channel-lock pliers
– Faucet handle puller (optional, helps remove stuck handles)
– Replacement washers, O-rings, or cartridge (depending on faucet type)
– Plumber’s grease for lubrication
– Clean cloths or rags for cleanup
– Bucket or pan to catch any water left in the line
Not all leaks are caused by the same problem, so it helps to open and inspect the faucet first. This way, you’re not guessing which parts need replacing. If you’re unsure what to buy, take the old parts to a local hardware store to compare and match replacements. Using the correct replacement parts ensures a better fit and stops the leak effectively. One homeowner in Cleveland shared that they tried three different washers before realizing their faucet used a cartridge, not a standard compression setup. That small mistake turned into a whole afternoon project. Doing a quick inspection before making any purchases can save time and reduce frustration.
Up next, you’ll walk through the basic repair steps. This won’t cover every faucet style out there, but it will give a general direction on how to remove, inspect, and replace parts commonly responsible for leaks. Whether your leak is slow or steady, these steps can help solve the problem at the source.
Step-By-Step Guide To Fixing A Leaking Bathtub Faucet
Begin by turning off the water supply to the bathtub. You can usually find the shutoff valve near the tub or somewhere along the main water line. If you can’t locate it nearby, you may need to turn off the main water supply to the house. This step prevents any water from spraying out as you open the faucet or disconnect parts.
Next, remove the faucet handle. Most bathtub handles have a small screw hidden behind a cap on the front or underside. Use a flathead screwdriver to pop the cap off, then unscrew the handle with a Phillips screwdriver or Allen wrench. Once the screw is out, gently slide or pull the handle off. If it feels stuck, a handle puller tool can help apply even pressure without causing damage.
Once the handle is off, you’ll be able to access the valve stem or cartridge behind it. Use an adjustable wrench or pliers to slowly loosen and remove this component. As you pull it out, check for any signs of wear like cracked rubber or corrosion. Most leaks come from worn washers, deteriorated O-rings, or debris buildup. Replace any damaged parts with exact matches for your model. It’s always smart to bring the old pieces with you if you’re going to a hardware store.
Before you reassemble the faucet, apply a small amount of plumber’s grease to moving parts. This helps parts fit together smoothly and prevents early wear. Once everything is reinstalled, turn the water supply back on and test the faucet. If there’s no more dripping, the repair was successful. Take a moment to tighten any remaining screws and wipe down the area.
Preventive Maintenance Tips To Avoid Future Faucet Leaks
Keeping a bathtub faucet in good condition doesn’t require much effort, but ignoring small signs of trouble can lead to bigger headaches later. Simple habits go a long way toward avoiding leaks and keeping your fixtures working as they should.
Here are a few tips to help avoid future faucet problems:
– Check your faucet handles regularly. If they’re getting harder to turn or feel loose, that’s an early sign parts are wearing down
– Keep the area around the spout dry when not in use. Constant moisture can weaken seals and promote corrosion
– Clean faucet components with mild soap and water to remove mineral buildup. Avoid harsh cleaners that can damage the surface or internal parts
– Make sure the faucet is turned off tightly, but don’t force it. Over-tightening can wear out internal components faster
– Listen for changes. If your faucet starts to hum, squeak, or rattle, that’s worth checking even if you don’t see a leak yet
One family in Cleveland noticed a slight rattle in their faucet handle weeks before it began dripping. Because they didn’t act early, the issue became more complex and required multiple parts to fix. Acting as soon as something feels off helps catch leaks at their source before they become larger repairs.
When To Call Our Professionals
There are times when a simple faucet fix turns into something more involved. If you remove the handle and don’t recognize the components or can’t get them loose without damaging nearby tiles or surfaces, stopping the job makes sense. Faucets that continue leaking after trying basic fixes may have a deeper issue behind the wall, such as problems inside the valve body or plumbing connections.
Here are situations when calling our professionals is the better route:
– Faucet parts are corroded or broken and difficult to remove
– The faucet is built into the wall and hard to access without damaging finishes
– Leak continues even after replacing washers or O-rings
– You’re unsure whether your home uses compression, ball, or cartridge-style faucets
– Drips are coming from the wall behind the faucet, not directly from the fixture itself
Our technicians have the specialized tools and experience to handle more complex plumbing work safely. This helps prevent further issues and ensures everything is sealed and reassembled the right way.
Keep Your Cleveland Home Leak-Free
Fixing a leaking bathtub faucet should never be put off. While it may start small, a steady drip can signal worn or broken parts that get worse over time. Addressing the issue early can keep your bathroom functioning properly and help reduce water waste.
Regular checks, quick action when problems show up, and inspections for signs of wear can prevent repeat issues. When a simple fix turns complicated, calling in trained professionals ensures the job is handled efficiently and without guesswork. Keeping your plumbing in good shape means fewer surprises from leaks or repair costs down the line. Homes in Cleveland benefit most when small repairs don’t turn into bigger issues.
If you’re noticing issues with your AC performance, McWilliams is here to help with expert solutions tailored for your home. Our professionals can address equipment wear and ensure your system runs smoothly throughout the season. For reliable plumbing in Cleveland and for a quick estimate or to book a service visit, please contact us today.
Share This :

ferociousmedia
Table of Contents
Latest
Discover New Blog Posts
Stay updated with our latest blog posts.
An AC blowing warm or weak air is one of the most common (and most urgent) HVAC complaints in Texas homes, and it almost always […]
A water heater should operate without drawing much attention, so popping, crackling, or rumbling sounds coming from the tank can be concerning. Your system may […]
When the water in your bathroom sink starts draining slower than usual, it does not take long before it turns into a daily frustration. Standing […]